I've challenged myself to taking thrift store finds and making them fashion wearables or new home decor. Whether it turns out to be a mess, or a surprising success, it'll be here for your enjoyment (and my closet).
Happy Memorial Day! Today is a day to remember those that fought for our freedom. I saw a perfect saying today "Home of the free, because of the brave". I think this encompasses the spirit of the day very well. Both of my brothers, numerous uncles and my grandfather are all included in that brave, and I am more than proud to say I am related to and support that kind of dedication to our country.
I had to find an awesome dress for this weekend, and this one fit the bill:
It had good bones and a fantastic pattern... but it was completely see-through. Not all that appropriate for any sort of public festivities - or just public in general.
With time not on my side (gorgeous weather! cookouts! family time! Ice Cream!) I made a quick three cuts. That was all it took to make this into a great top. I cut the bottom portion of the dress off (it's not like a see through dress was of any use to me), shortened the arms and made the neck less constricting.
With a quick sew on the arms and the bottom hem (I kept the boatneck with a cut edge) my shirt was ready for the holiday!
And because the holiday is one to celebrate the soldiers - I threw some red, white and blue together in the spirit of freedom.
Along with a National Holiday, today is also my husbands birthday. With the weather being absolutely gorgeous, it demanded us being outside. We went to a National Park near us and took a quick three mile hike around the lake. The views, however few and far between, were quite awesome.
Oh yeah - and I may or may not have dyed me hair pink.
Answer - may not. I ain't crazy! Although, hair chalk on sale at TJMaxx saw me coming a mile away.
Sorry this post is a day late. Tends to happen when you forget to hit "Publish".
What happens when you've got somewhere to be real quick-like? Or when you've got an idea for a project but don't want to make it final by sewing it quite yet? Or when something is just not quite right?
Safety pins. (And shameless plugs of old wedding decor that I swore I'd use again)
Here's what I started with... When I bought it, I thought I was getting a sweet deal on a dress. I threw it in my cart when I saw the $3 price tag, and danced out of the thrift store. Then... I put it on..
What is this?! (The dress, not the slippers. The basement is chilly!)
I had to get rid of those flaps, but didn't want to just cut them off because I'd have to tear the entire dress in half. Eventually, that'll be where I go with it. For now - ain't nobody got time for that. I had a summery weekend to enjoy. So, I went with the following steps.
1. Gather weird flaps.
2. Stretch flaps and bring together.
3. Tuck it in like you do your phone when you have no pockets. (Come on, I can't be the only one! Anyone? Anyone?!)
4. Pin until it doesn't look weird.
With one simple fix in four easy steps, my dress is no longer a "what is that?" dress.
Coming up: it's rummage sale season! I'm excited to try to pull my experiences whilst rummage saling into my posts - possibly with a "day in the life" or hauls. If you hate it, let me know. If it interests you and want to see more, let me know that too. As always - comment away or reach me at thriftysew@gmail.com!
Happy Sunday, all! Hope everyone is enjoying their weekend. I had a great weekend of cleaning out my closet, wandering around Target and just generally enjoying the nice weather. It's been mid-30's here lately, which I will take any day over the negative degree weather we've been having the past few weeks.
I get sent quite a bit of pictures from you guys with a random "can you do this?!" or "check this out!". I recently received one from my sister-in-law that got my gears grinding. It was cute, and something that I was pretty sure I could handle. This is what she sent me:
Seems easy enough. Take a few shirts, spin 'em into awesomeness. Got it.
Off I went to Salvation Army. After I donated 4 large bags of giveaway items from my and my husbands' closets, I popped into the store part to see if I could find any shirts that would look ombre-esque. As I wasn't a huge fan of the above colors - I improvised.
Close enough.
Each shirt was $2 or under (the light purple was $1) so altogether this dress cost me $7. That's comparable to some scores that I've found on Target 75% clearance rack, so I will take it.
Now, I'm short, but I was skeptical about this project. I wasn't entirely sure if these shirts would hit the ground. Especially since I, unlike the inspiration picture, am more partial to empire waists than drop waists. So, I got out my pins and before doing any sewing, I thought it out.
As you can tell from my ecstatis thumbs up - this plan will work. I think.
First, I cut all of the purple shirts off at the armpits. Then, since all of them were quite obviously different sizes, I cut them all to the same size.
Learning from my many past mistakes, I did make the bigger shirts a tad larger than my goal, to leave room for seam allowance. How's that for thinkin' ahead? There may have been a happy dance involved at my noticing that I remembered this. Post-dance, I sewed up the seams so I had three equal sized tubes.
Next - a lot of sewing ensued. I sewed each tube to each other, making sure that all right sides were where they were supposed to be. I also made sure to made the darkest shirt, the bottom, so that the bottom of the t-shirt was the bottom of the dress. This was for no other reason than I hate hemming. Hate it.
Go fancy sewing machine go!
Once I had all the purple sewed together, I cut the black shirt a bit lower than my natural waist, and sewed my large purple ombre to it on the light purple section.
When all is said and done... I can't walk in it and will be sewing a slit in it VERY soon. It's super pencil skirty.
With that said though - it didn't come out all that shabby! Challenge accepted and sort of mastered.
Hope you all enjoyed this weeks project. It was a pretty easy going one. Like I told my husband - I'm not sure if this was a super easy project or if I'm getting better, but the whole project took me an hour. And that does not subtract the time I spent watching random YouTube video's (there were a few).
Have a challenge? See something on Pinterest that you want me to mess up? Send it my way to thriftysew@blogspot.com. I'll see what I can do with it. As always, whether I mess it up or master it, you know I will show you.
Finally got to play around with my sewing machine and it is all sorts of awesome. It's like I don't even need to know how to sew - I just put things under the needle and it happens. Here's a little insight into my random practicing. It includes a button hole and a bunch of lines of different stitches.
I mean - how cool is that?!
So here's what I had to work with this week:
This is a Talbots skirt that I scored for $1. When I got it home, I realized why it was only a dollar - the under skirt was a mess and the closure to the dress was nonexistent. I wasn't sure if someone ripped off the zipper or what, but nothing was there - including a button hole for any would-be button closures. I was lost.
So I did what any self respecting sewer would do when faced with something completely confusing - I made stuff up.
I started with making a 10 inch slit on the inside of the skirt on the side seam. I then cut the outer skirt in the same slit and then sewed it all down. See where this is going? I only had a vague idea too.
This would be an arm hole - surprise!
I then put on my new garment, sewed out a neckline and chopped off a few inches on the bottom of the underskirt. What was the result? A somewhat unflattering tunic that was perfect with leggings.
I only had made one armhole because I was super uncomfortable making it and was unsure what I was doing. Now that I see the result of it, I should have made two - I enjoyed the look of the shoulder and it wasn't all that hard to create. Next skirt, I suppose.
Hope you all are enjoying your Sunday - the hubster and I are enjoying a quiet night at home doing homework (him) and watching Netflix and Pinterest-ing (me). Big night for us.
Happy Sunday all! I took to my craft room and attacked my stacks of fabric again. Not sure what got into me, but I got it into my head to make some shorts. It was probably while I was staring out my window, looking at my three inches of snow. I just want spring to come. I'm done with winter. Thanks, Mother Nature, it's been fun, but please haul out any day now.
The only problem with my whole idea was that I have no idea how to make shorts. After a few quick google searches and youtube video watching, I decided to just get on with it.
I grabbed a pair of shorts from my drawer - a pair of Old Navy shorts that I was quite partial to this summer. I folded the shorts in half and also folded the fabric in half. I put the straight edge of the shorts on the folded part of the fabric and traced around it.
Then I did that same thing a second time to end up with two pieces of fabric in the same shape. Then I put one piece on top of the other, right sides together. Keep in mind, although I left room for seam allowances, I did not measure (true to form, I suppose). Should I repeat this process, I would certainly measure and make a deaper curve.
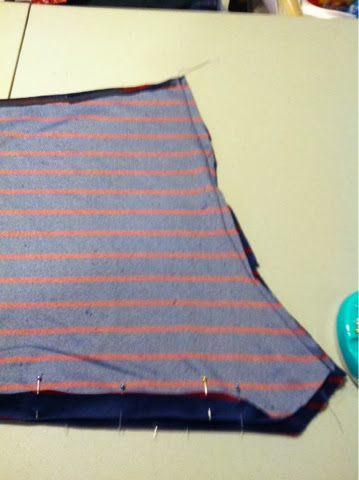
Next, I sewed the two curved sides together. Only the curved sides. This is important. Believe me... I learned that.
Next, I hemmed the bottom so the legs would be properly hemmed. I wasn't going to do this (lazy), but the edges kept rolling anyway, so the thread in the hem weighed it down just enough to stop rolling
Once the hem was sewn, I folded the entire shorts from the middle to put the two side seams together. I know that comes out confusing so maybe these pictures would help.
Find middle:
Put the seams together. See what's happening here?
The next step is to sew up the crotch. You should see it form at the bottom so you'll know exactly where to sew. This was my second mistake - the crotch was rather flat, when it should hae been a distinctive V. Although I knew this, I didn't want to cut into it and totally ruin it, so I let it be. Next time, I'm cutting that crotch into a V. (P.S. Read in the wrong context, this post may become PG-13, My late apologies.)
Next, I worked on the waist. For this, I needed an old friend... non roll elastic.
I sewed the elastic onto the inside of the shorts (keep the shorts inside out and sew the elastic around the band). I then folded down the elastic to completely cover the elastic in fabric, and sewed it down again. Once finished..
And voila. Girl's got herself a pair of shorts. They are certainly not perfect - the crotch area, for most of the reasons listed above, turned out not quite right. It had a bit more fabric bunching than a girl needs, but they are certainly comfortable. I've got myself a new pair of pj shorts. The fact that I made them out of a fancy beach-towel material also played to the fact that they would never see public. Next shorts I make will be an attempt at beach shorts, but maybe I'll wait for better weather to go about doing that. For right now, I'm back in my sweatpants and sweatshirt, cuddled under a blanket and sitting in front of a space heater.
In other news....
I bought myself a sewing machine.
Yes, it was the one that I was eyeing and I ended up getting it for a pretty great deal. Thank you everyone for your thoughts and opinions on the subject - especially all of the super helpful e-mails. In the end, I made the decision on the reputation of the Singer brand and, most importantly, my budget. The fact that I had gift cards to Joann's certainly played a good role as well.
Enjoy your Sunday, friends. I hope it is as relaxed as mine has been. Hopefully next week will be a nice shiny new project on a nice shiny new machine.
Happy Sunday all! Things are starting to look up - it's actually above 0* and I have had a great Friday at work (just Friday... the rest sucked). I spent a congratulatory Saturday wine touring at some of the best wineries... it was a fantastic weekend.
So this weeks project was pretty fun to do. I even got Sophie involved. Here's what I started with.
Pretty gorgeous, right? This had little black dress potential, but felt more like a jacked up mermaid dress. Something had to happen here and frankly, I was sick of dresses. So, I pulled out Sophie and decided to make myself a shirt of a different kind. I literally had no idea what I was doing - so I just winged it.
I knew I wanted to keep the little skirt at the bottom, but was unsure where I wanted to put it. Once it was on Sophie, I decided to bring the skirt up to an empire waist. No one hates an empire waist. I turned the dress up and took an inappropriate picture of Sophie. This is all for you guys.
I pinnned the seam from the skirt to the area where I wanted my new waist to be. Unfortunately, I did not take any pictures other than the above one of the process so... get out your imaginations.
I sewed a new seam where the pins are in the above picture and then cut off all the excess below the pins. Then I turned eerything right side out and had myself a peplum style empire waisted shirt. The skirt made the peplum super puffy, so I brought the sides of the lower part of the shirt in about 4 inches on each side so it wasn't quite so "bubbly" around my middle. I have 4 gym sessions a week that call to the fact that I don't want anything extraneous hanging out around my middle.
In the end, I didn't hate the result. I wasn't in love with it, but I adore the fact that I did it correctly that it didn't look like a dress that was half sewed upside down..... because it was.
I've decided to bring back a trend that I started at the end of last year but didn't quite continue because my weekends were hectic: slow cooker meals. I decided to bring it back to my homestead this weekend. I bought a packet of slow cooker sauce at Target. For those interested, they were having a special for $1.50 each and, when buying 10 you got a free $5 gift card (essentially making them $1 each). I only picked up one because I had no idea how they would taste. It was pretty easy to throw together. It was literally the packet of slow cooker sauce and a 2-pound pork shoulder.
VERDICT: It had good taste, but was super salty. Although it was super easy to put together and pretty inexpensive for the amount of meat it produced, I probably would not repurchase because of the salt.
Hope ya'll enjoyed this week's post. As alway, feel free to leave comments or click on the "Contact Me" page to sned me a message.
This is a doozy of a post, let me tell you. This took me a computer, an iPad, an iPhone and a camera to complete and I'm still not entirely sure if I've structured it the way I wanted to. You're welcome.
So I was shopping at the Salvation Army not too long ago, and I came upon a dress that made me completely and utterly miss my childhood. First, watch this video. (Yes, it's 2 minutes long, and yes, it has the commentary of my family and I because I couldn't get it in iMovie to edit it. Fail. I get that.)
This was one of my dance recitals when I was 4 years old. I can still sing every word, and still know most of the steps in the correct order. I was "All Dressed Up in Grown-Up Clothes" and got to don my mother's dress and jewelry for this recital. I danced from ages 3 until 19/20 (college) and miss every second of it.
So, imagine my surprise when I came upon this gorgeousness in the thrift store:
I put the old school filter on this one to channel my 4 year old self. Note - don't pay any attention to the striped tank top underneath. This dress is super see through.
This dress was the same color and had the same feel as mom's dress that I used for the dance above. It wasn't exact, but it was enough for me to spend a bit more than usual on it - 4 dollars! First thing was first - remove all unnecessary shoulder pads as well as the weird flap on the chest (what is that, anyway?)
Next, I had to do something with the skirt. It was super long and as super see-through as the top, so it was quite the challenge to figure out what to do with it. Finally, I decided on a bubble skirt (channeling the tutu here). To do this bubble skirt, I folded the bottom hem up inside the dress and sewed it down on the elastic. This poof'd it out enough to be bubbly, but not overly annoying.
I admit, it does not look pretty, but this is the inside. On the outside, it looks like a regular ol' cinched waist. Win-win!
Next, I removed the sleeves. I did this for 2 reasons: 1) sleeveless is way more dancer-like and 2) they were cutting off my circulation. I don't have rather large forearms, so I thought, but these things cinched right onto them like I was hulking it up. Not pretty, nor comfortable. This is where I messed up, because I cut off the first sleeve the wrong way, so the cut was on the right side of the fabric. This made it necessary for me to hem the sleeve (when done right, this shouldn't be needed, for short-term use). Then I couldn't really go and do the other arm correctly, so I intentionally cut it wrong again and did the same type of hem on the other side. It was quite the time waster, but at least both arms look equally messed up. Score?
Paired with my leggings and a black tank top, I had a dancers dress that my 3 year old dancer self would have been super jealous of (and also my 4 year old to 19 year old dancer self - these were a hot commodity!)
Bring on the let warmers and the tap shoes!
Hope everyone had a fantastic Thanksgiving, and that you didn't get trampled on Black Friday if you were ballsy enough to go out.
And, if you find yourself celebrating Christmas (as we do) - do you have your tree up yet? We put ours up today and I couldn't be more in love with it.
I am super excited for the holiday season - I am quite the little child at this time of year, so it's only appropriate I share a bit of my childhood with ya'll today.
For today's crock pot meal: Southwest Chicken
- one bag frozen corn
- 2 chicken breasts (frozen is fine, I did it and I'm not dead) skinless, boneless and all that jazz
- 1 can black beans (drained and rinsed. if you don't it's gross)
- 18oz salsa (I used mild, but medium may give a bit more pop)
*Note* I ended up using a half bag of frozen peas, and a can of kernel corn because I was lacking the frozen corn aspect. It worked fine.
Throw the chicken, corn, black beans and salsa in the crock pot. I then put it on low for 4 hours. Once it was done, I shredded the chicken and stirred up the pot. I served it over jasmine rice with a bit of shredded Mexican cheese on top, but it is also quite tasty over tortilla chips with cheese and sour cream. Do your thing - it's kind of hard to screw up.
I even got the "pretty delicious" comment from my husband so, there's that. (That comment doesn't happen. Ever.)
So tasty, in fact, I didn't take any pictures. Sorry :*(
Now, all you Boston baseball fans can go ahead and click off - this has nothing to do with the famous baseball field and everything to do with this monstrosity:
Please try not to judge the sweatpants. It's that time of year that it is really, really cold in my craft room, so sweatpants and long sleeves are quite necessary.
Anyway - this dress was a mess. I picked it up because I'm a big fan of green lately, and it was priced at $1. It was one of those situations that you just don't say no to. I didn't have too high of expectations here. I was quite excited, however, to find pockets. The super dropped waist and the tutu like skirt, though... I could go without it.
First thing I did was disconnect the top from the bottom by unstitching the dropped waist. We were going to pull that waist up.
Next (and I failed miserably on pictures here), I put the bottom over the top and sewed it together with a waist that actually falls at my natural waist. This also solved the long length problem and brought it up to an appropriate knee-length.
Before you get to thinking I'm actually getting good at what I do, let me tell you how erroneous that actually is.
Proof:
This is the top of the dress, which is inside out, and the skirt bottom, which is right side out, and the visible seam in mint green. Also known as... my first mess-up.
I had to rip all that out and go at it again. The second time, I made sure to cut the excess top, and line up my seams correctly. Also, because the bottom was a lot bigger than the bottom of the shirt, I ended up making two pleats in the front and two pleats in the back. This was my first time adding pleats to anything, and I only made one inside out. I'm going to go ahead and call that a "win".
Close up of my pleats in the front.
I wanted to change the neckline, but as you may have noticed from my mess-up photo, I was using mint green thread. Unfortunately, I am finding that my thread collection is severely lacking, as every time I look for a certain color... it is not in my collection. This particular green was not in my collection, so I was unable to do any seams that were going to be visible to the general public.
So, for now, this is the end result until I can own a green thread that matches:
Although it is a bit big, I didn't want to make it smaller and lose the pockets. I did take off most of the sleeve and created a cap sleeve so it wouldn't look so large. Also, to cinch it in a bit, I brought out my trusty belt.
I'm actually quite a fan of this dress. Once I change the neckline up a bit (I'm thinking a good ol' V-neck would do fine), it will be within a normal rotation to my work clothes.
Now, for the new addition of my crock-pot meal. It was another chicken pot today - Pulled Mexican Chicken. I'm not a huge fan of red meat so it's only about a once a week thing in our house. Chicken, however, plays a main role in many of our dishes. Wegman's makes it super easy when they individually wrap it up for us...
This recipe is super easy. There's no link, because it's basically a recipe I made up with the combined use of other recipes of it's like. All you need is:
- 4 chicken breasts
- taco seasoning
- chicken broth
First, throw the chicken in the bottom of the crock pot. Then toss in the full packet of taco seasoning (at the end, I added another packet, so feel free to throw two packets in there if you like it well-seasoned). Then, add some chicken broth. I'd love to tell you how much to use, but I didn't have a clean measuring cup so I eye-balled it. I was aiming for 1 cup of broth, but it was probably only 3/4 cup. I tend to go light-handed when I estimate. Then, cook it on low for 4 hours. After 4 hours, shred up the chicken with two forks, and then put the top back on the crock pot and let the shredded chicken hang out in the juice for a while, but turn off the crock-pot so it doesn't continue cooking.
Enjoy! This is especially good when thrown into a tortilla with some tomatoes, lettuce, sour cream and salsa, but I'm not here to tell you how to eat it, just how to make it :)