Showing posts with label charity. Show all posts

Wednesday, May 15, 2013

School Marm

Hey y'all! Sorry about last week's hiatus - as I had mentioned in my last post I was mentally tapped. However, now I'm back and in action!

Here's what I was working with that has posed the biggest challenge for me thus far.

I'm not proud of this face, but unlike other weeks, I only took one before picture to choose from. Lesson learned.

So when I bought this, I decided that I was going to take off the vest part and just have a clean white button-up shirt with a teal skirt. Everything was a cool clean linen so it would have been a good summer dress. Then I started ripping it apart....

 
The first thing that I discovered was that the vest, shirt and skirt were all sewn together. Therefore, when I seam ripped the vest off the entire front and back of the dress disconnected from each other. As you can see above, the only way to keep them together was to pin the sides back together as I was seam-ripping, making sure the vest was out and the front and back were together.
 
Then, I discovered that the "vest" was actually just a fake panel in the front. The back of the dress was the teal color (not what I wanted the final result to be). So I did the only thing I could think to do - I took off the back panel. Since the waist was elasticized, I cut the panel about 2 inches above the elastic and folded it down over the elastic and pinned it. This made the edge cleaner instead of just the raw edge that I cut. I thought this would be a nice, backless number that is now pretty popular in Hollywood lately. What I had forgotten was... I have a chest. When I tried on the dress, I was showing a bit more on the sides than I had anticipated. As working the corner isn't my style, I needed to harvest extra fabric from somewhere. So I did what I do; I removed the arms. (Sorry, Mom!). I removed pretty much all of the fabric right up to the collar on the neck, essentially making the collar into a halter top.

Try not to judge the complete disaster that is my craft room. Ever since I brought in all that fabric (!) I have been having some spatial issues. Until I figure out storage... organized chaos is what it'll have to be.
 
I now had to figure out what to do with the back to cover up the side exposures. This is also when I decided I needed something on the back to cover up an eventual bra back. It just wasn't optional. I seam-ripped the arms so they were one flat piece of fabric (instead of an arm tube) I first put the arms on in a way that created a key hole back, as such:

I was actually very, very much in love with this look. I pinned everything up and prepared to sew it up.

Then came the realization: I can't get it off Sophie.

There was no way to pull it over the head, and there was no way to shove it down the hips. It was stuck. Therefore: not able to get it off of Sophie = never being able to put it on myself. I had to think of another option. Although zippers and such were an option, I really don't yet have the tools (read: zipper foot) to do that. I know I could sew it in by hand as well, but I'm just not there yet.

 
I turned it into a true halter top. I took both sleeves and sewed them together in a way that created an entire panel, then I pinned it to the sides of the halter top and to the top of the skirt. The only thing left to do now is to purchase some more elastic to make the top of the back snug to my back so it will stay up. I don't have any elastic left in my craft room and have yet to do my craft haul, so I can't sew it all up yet. Save for a bit more sewing - this dress is done, and I'm super happy with the result.
 
And you know I'll jack it up when it's all said and done. I even have my accessories picked out...

 
Thanks for being patient with me on my hiatus last week. For those that are interested, I ended up signing up for that 3.5 mile run. So, starting tomorrow I will be adding yet another task to my jam-packed days - going to the gym to train. At least it's got me motivated? As always - you will hear how it all goes!
Thursday, May 9, 2013

I Hate To Do This Again

Welcome to Thursday ya'll!

Unfortunately, I don't have a post for this week. I've started my job and it's honestly taken up pretty much 100% of my brain power. When I get home, I typically dive right into creating a dinner for me and the hubster and that's the end of my mental output for the day. I had no idea I would be this exhausted! A big part of it is that I am no longer completely confident in what I'm doing. Folks, there IS fear in the unknown, and that fear is exhausting. I can feel myself already getting comfortable with job tasks, so I soon see myself more confident and, in result, having more energy at the end of the day.

Just a few things that I am looking forward to to keep ya'lls interests piqued:

- Remember at the beginning of the year I made my resolutions? Two of those resolutions were to get healthier, and experience the city of Syracuse more. While I've certainly not managed the healthy part this week (I have yet to eat my lunch all the way through - too anxious to get things done!), my new place of employment has a 3.5 walk/run coming up mid-June that they have invited me to go on. I haven't yet given my answer, but I'm thinking about participating. This is definitely a "two birds with one stone" situation. I will have to complete some training of some sort to run this race, although knowing it's okay to walk and some people are walking the whole thing makes me feel a bit better about that. This makes me healthier. It is also a race that the entire city of Syracuse participates in. Thousands of people join together in the race and have dinner at the end, catered by a pretty popular restaurant here. This certainly makes me experience Syracuse. In summation - I'm thinking about signing up for it. It'll certainly be out of my comfort zone. I will be with my new coworkers, whom I know pretty little at this point, and will be showing them my unfortunate athletic skills. Therein lies the "maybe next year" thought. We'll see how it goes. 

- Even though I don't have a project to present to you this week, it doesn't mean I don't have something in the works! I've been working on a dress that is surprisingly hard. This is part of the reason why you're not seeing it - the additional brainpower it requires was just not there for me this week. I looked through my past few projects and felt a bit discouraged. Yes, I've been practicing and "tweaking" thrift items, but it's been some time since I've attempted to transform something. In result, I chose the worst looking garment on my "to be refashioned" rack and decided "this is being transformed into something great. That "something great" is in process and, as always, bad or good you will see the result!

I hope you all have a fantastic weekend! I will be spending time with my beautiful mother for Mother's Day and working a bit on my new dress, so I'm certainly excited for this weekend to come upon us! Happy Birthday to you hardworking mom's out there - I still don't know how you do it!  

Wednesday, March 13, 2013

Pillowcase for a Cause

** BREAKING NEWS** Regular blog post day has come upon us. I have made the decision that Thursday nights will be THE. NIGHT. for new blog posts. Check back every Thursday for a fantastic new redo, remake and/or refashion! Now back to our regular programming...

Sad news - no before pictures today! But there is a reason for that: I'm sewing for a cause tonight. I stumbled upon this site that had a charity drive of pillowcase dresses going on. I'm all for charity - I used to volunteer lots and lots of my time when I had lots and lots of time to spare - so I figured one that crossed charity and sewing just absolutely had my name on it. Basically, this little girl and her mother help out Uganda's children effected by the war as much as they can. On this next trip to Uganda, this girl is collecting pillowcase dresses for both the little girls that she has sponsored, as well as the other little girls in the villages in which she visits. This girl is pretty amazing to have suchy a caring outlook on a world that isn't always a fantastic place. Kudos, child, kudos.

After reading about her mission, I went right out and bought some cheap pillowcases at the dollar store and some ribbon on sale at Joanne's. There are a lot of tutorials online for pillowcase dresses so I wanted to do the first one at low-cost in order to really get the hang of it.. I picked up some pillowcases that were in "micro jersey" and knew that jersey was stretchy i.e. the perfect fabric to stretch and move with active little girls. Well, it turns out my idea of "micro jersey" and the manufacturers version of "micro jersey" are very different because this fabric was very thin and very see through. Unless this dress was going to be for a girl who participates in corner-like activities, this was not something I was sending to Uganda. I decided I'd use it as a template, see how it's put together and figure out the measurements.

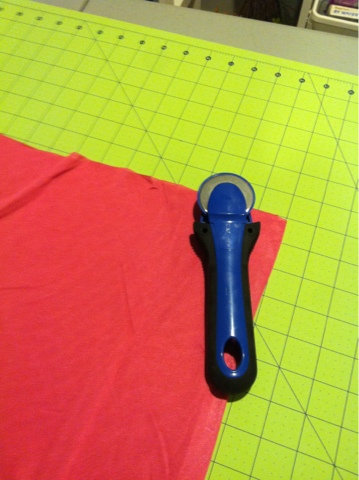
First up, I cut off the end of the pillowcase that was closed shut to make a large tube.


Next, I measured the u-shape for the arms. Not having kids myself, I had no way of measuring, so I just kind of guessed. Turns out, I guessed wayy too big. I did the armhole 4" across and 5" down. It probably should have been 2" across and about 4" down. I'll know for next time. I then folded it in half and cut the u-shape through all four pieces, making sure they were all even.

Okay, I lied. I actually didn't do that, but that's how you should do it. I cut both sides separately before I remembered this little gem of advice, so when I actually did fold it in half, it was way uneven and I ended up having to cut it all again.


I then pinned a hem on both the u-shapes, the front and back panel, and sewed it up.

Okay, I lied again. I knew this was practice so I didn't create a hem on the front and back panel. Again, though, this is something you should do.

Action shot!
 
You may be asking "why the heck is she using black thread?" And that is a fantastic question. In all honesty, I did it because that was the thread/bobbin that was already in my machine. In the end of the project, it did actually make it easier to tell what I did for when I make future ones. Also, for the benefit of this blog - all the black stitching will show where I sewed in case you want to do one too and I've accidentally left out describing a step (or two).
 
For the front and back, I folded the top down into a casing a little larger than the thickness of my thread. In the below picture, you can see where the black thread is dark at the beginning and ends of my stitching - this is because I always backstitch a few (probably too many) stitches whenever I start. Unless it's a stitch that you want to break, it's always a good idea to backstitch each time. Otherwise, you'll have some unintentional poppage going on somewhere.
 
Then I took my high-tech safety pin and put it on the end of my ribbon and brought it through the front casing. Repeat on the back side.
 

If it wasn't see-through, the measurements that I ended up doing would actually be a pretty nice summer shirt for me. Alas - it is see through so you'll just have to look at good ol' Sophie sporting it.

 
So that is my own little how-to on pillowcase dresses. I do hope I've inspired you to go to the website, check out the cause, and get involved. It is fantastic practice for other sewists (not sewers... never sewers) like me, and surprisingly quick and easy to do. I definitely plan on doing more and sending them to Mallory to bring to Uganda for the little girls. I'll be sure to photograph the final package!
 
See you next Thursday!