** BREAKING NEWS** Regular blog post day has come upon us. I have made the decision that Thursday nights will be THE. NIGHT. for new blog posts. Check back every Thursday for a fantastic new redo, remake and/or refashion! Now back to our regular programming...
Sad news - no before pictures today! But there is a reason for that: I'm sewing for a cause tonight. I stumbled upon this site that had a charity drive of pillowcase dresses going on. I'm all for charity - I used to volunteer lots and lots of my time when I had lots and lots of time to spare - so I figured one that crossed charity and sewing just absolutely had my name on it. Basically, this little girl and her mother help out Uganda's children effected by the war as much as they can. On this next trip to Uganda, this girl is collecting pillowcase dresses for both the little girls that she has sponsored, as well as the other little girls in the villages in which she visits. This girl is pretty amazing to have suchy a caring outlook on a world that isn't always a fantastic place. Kudos, child, kudos.
After reading about her mission, I went right out and bought some cheap pillowcases at the dollar store and some ribbon on sale at Joanne's. There are a lot of tutorials online for pillowcase dresses so I wanted to do the first one at low-cost in order to really get the hang of it.. I picked up some pillowcases that were in "micro jersey" and knew that jersey was stretchy i.e. the perfect fabric to stretch and move with active little girls. Well, it turns out my idea of "micro jersey" and the manufacturers version of "micro jersey" are very different because this fabric was very thin and very see through. Unless this dress was going to be for a girl who participates in corner-like activities, this was not something I was sending to Uganda. I decided I'd use it as a template, see how it's put together and figure out the measurements.
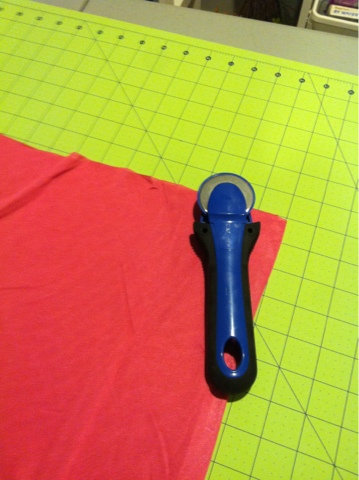
First up, I cut off the end of the pillowcase that was closed shut to make a large tube.
Next, I measured the u-shape for the arms. Not having kids myself, I had no way of measuring, so I just kind of guessed. Turns out, I guessed wayy too big. I did the armhole 4" across and 5" down. It probably should have been 2" across and about 4" down. I'll know for next time. I then folded it in half and cut the u-shape through all four pieces, making sure they were all even.
Okay, I lied. I actually didn't do that, but that's how you should do it. I cut both sides separately before I remembered this little gem of advice, so when I actually did fold it in half, it was way uneven and I ended up having to cut it all again.

I then pinned a hem on both the u-shapes, the front and back panel, and sewed it up.
Okay, I lied again. I knew this was practice so I didn't create a hem on the front and back panel. Again, though, this is something you should do.

Action shot!
You may be asking "why the heck is she using black thread?" And that is a fantastic question. In all honesty, I did it because that was the thread/bobbin that was already in my machine. In the end of the project, it did actually make it easier to tell what I did for when I make future ones. Also, for the benefit of this blog - all the black stitching will show where I sewed in case you want to do one too and I've accidentally left out describing a step (or two).
For the front and back, I folded the top down into a casing a little larger than the thickness of my thread. In the below picture, you can see where the black thread is dark at the beginning and ends of my stitching - this is because I always backstitch a few (probably too many) stitches whenever I start. Unless it's a stitch that you want to break, it's always a good idea to backstitch each time. Otherwise, you'll have some unintentional poppage going on somewhere.
Then I took my high-tech safety pin and put it on the end of my ribbon and brought it through the front casing. Repeat on the back side.

If it wasn't see-through, the measurements that I ended up doing would actually be a pretty nice summer shirt for me. Alas - it is see through so you'll just have to look at good ol' Sophie sporting it.

So that is my own little how-to on pillowcase dresses. I do hope I've inspired you to go to the website, check out the cause, and get involved. It is fantastic practice for other sewists (not sewers... never sewers) like me, and surprisingly quick and easy to do. I definitely plan on doing more and sending them to Mallory to bring to Uganda for the little girls. I'll be sure to photograph the final package!
See you next Thursday!
No comments:
Post a Comment