Sunday, September 29, 2013

Happy Blog-Day!!

Happy Blog-Day!!

Why do I call it that, you ask? Well - this day last year was the day that I decided to go ahead and build this blog; to put myself out there, failures and all, for all of you to see, criticize and enjoy. Today, I'm still at it and even have a following. I'd call it success, for sure.

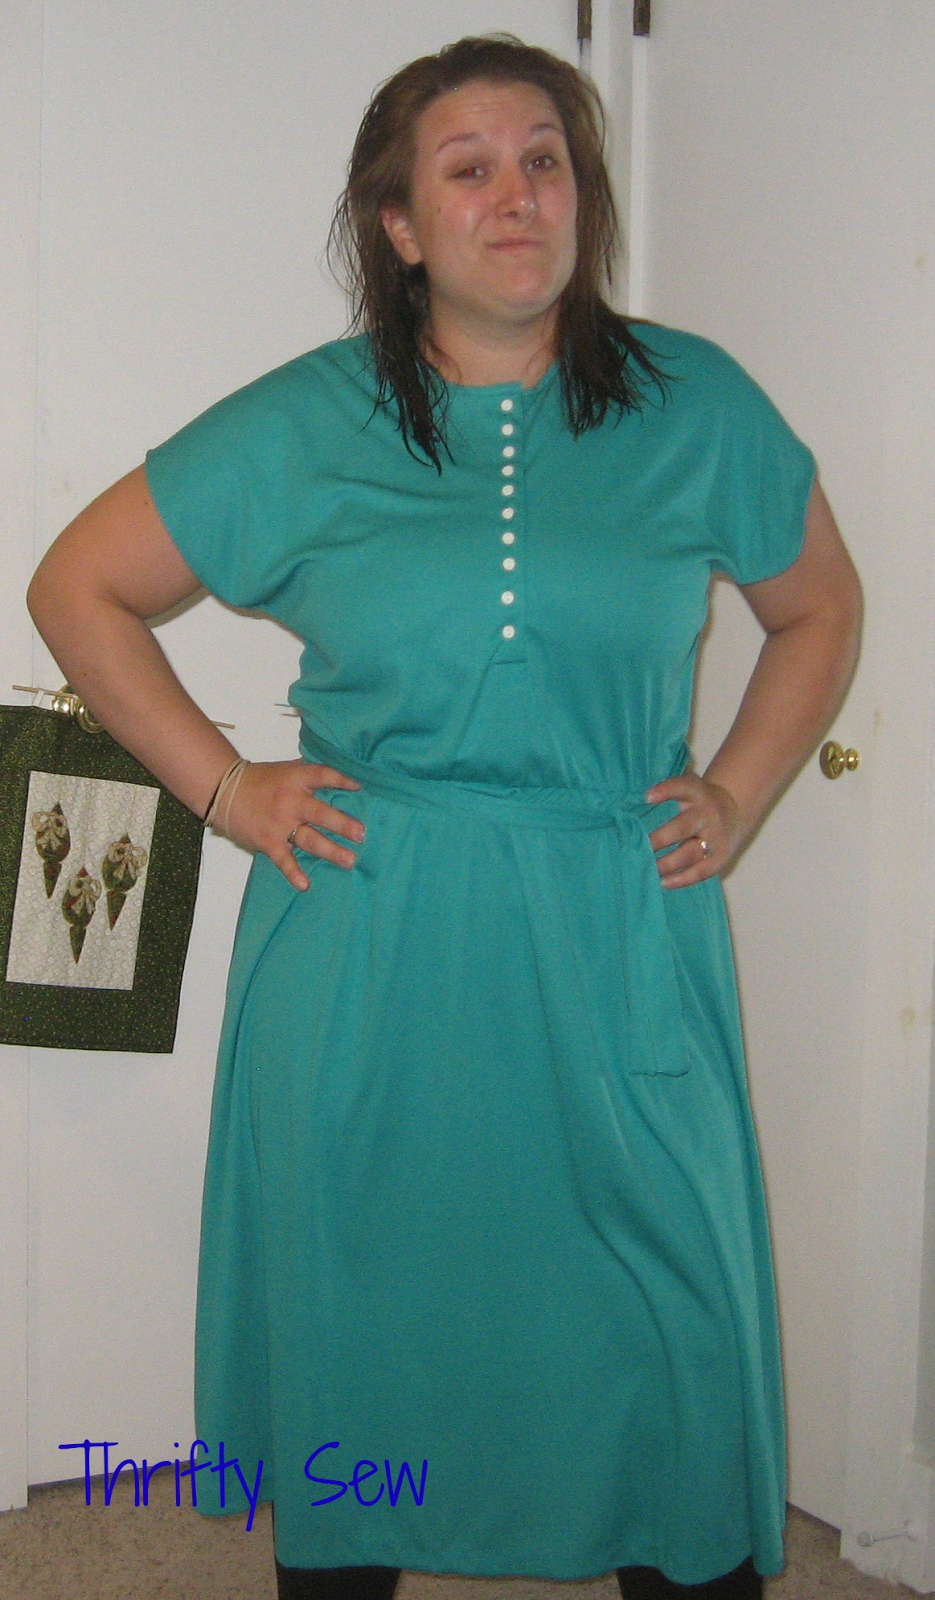
Today's project was chosen strictly because of its color. I had gone to Joann Fabrics a while ago and bought a bunch of thread, unknowingly purchasing two teal colors that I already had at home. So... I had a lot of teal to use up. Luckily, I found this:
Pay attention to the dress now - pay no attention to my just-showered mop of hair.

This wasn't actually too bad of a dress - the color was pretty and the waist elastic was still in fantastic shape. I was not, however, a fan of the many buttons going directly down my chest. It was super unflattering, and when you add it to the mid-calf length, it wasn't a flattering dress in the least.

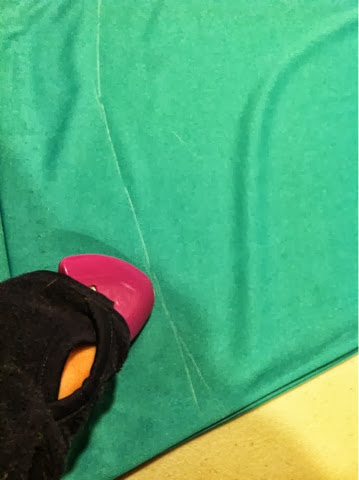
There was definitely potential though. My first step was to chop off the bottom to make it at least knee-length. This necessitated my using my  new favorite toy - the chalk wheel. You literally just draw on clothing. It's pretty awesome.
I then pinned up my new bottom hem, and brought a new character to the party...
 
That's right - I actually ironed my seams down before I sewed them. This is what we call: professional.

I then needed to work with the rest of the dress. After playing with the buttons quite a bit, I had a thought: these buttons would look way better on the back. So, because I do basically whatever I want, I put on the dress backward. This worked out quite nicely, save for the new neckline that was now cutting me off at the jugular. I almost put in the standard V-neck, but decided to veer off that well-beaten path and branch out a bit... to a scoop neck. (Oooooh, ahhhh, ohhhhh) As I didn't see anything else to help me out on this, I looked down and realized my tank top I was wearing had a pretty fantastic scoop neck. So... off it came and down on the table it went.
I traced the neckline, cut that half out, folded it over on the other side and used that part as a guide to make the other side even.  At that point, it was just a matter of sewing it down and throwing it on.

Final result:
It ended up being an overwhelming amount of teal when viewing from the front, so that is why I added a belt to break it up a bit. But the back I fell instantly in love with.
And what did I do with my shiny new dress, you ask? Well, I went straight to Wegman's to get Sophie and me some birthday cake. Because we deserve it.
1 year baby!
Here's to hoping it settles onto Sophie's hips and not mine.
As always, feel free to leave me some comments below, or I always enjoy your e-mails to thriftysew@gmail.com as well. I hope you all enjoy this gorgeous Sunday, and feel free to grab yourself a tasty dessert and celebrate 1 year with me :)
Monday, September 16, 2013

Fall Fever

Hey all - thanks for sticking with me while my internet was out. I'm up and running now and all set to post away :)

This post, as mentioned, is a bit different that what I normally do. I was sick with the stomach bug all weekend and finally felt a bit better on Sunday Funday, so I went into the craft room and quickly ran right back out. Why? Because it was straight up freezing in there - around 50 degrees. I love you guys... but that just wasn't going to happen.

So, since it's finally feeling like fall, I decided to do some baking to warm up the house. What better place to find a delicious fall baking creation? Why hello there, Pinterest. Besides, my kitchen was all spic and span and I couldn't let that go for long.
I decided to make a Crock Pot Apple Crisp. See all those apples in that basket there? Neither my husband nor I enjoyed them to snack on, so my options were: wait until they go bad or find something to bake. I decided with the latter, as I wasn't about to waste them. Plus, I wanted to get rid of them so I could convince my husband to take me apple picking. Don't really have a leg to stand on when asking to go apple picking when there's a basket of apples on the counter...

So I got all the ingredients together. Unfortunately, I forgot to take a picture of all the ingredients lined up on the counter (I'm not used to this foodie stuff), but I did get a picture of the most unappetizing "crumb" topping I've ever made in my life.
It was not looking promising at this point, but I powered through because that is what I do for you all. You're welcome.

I also powered through because I was super excited to use my spice rack. *You can see how I made it here.*
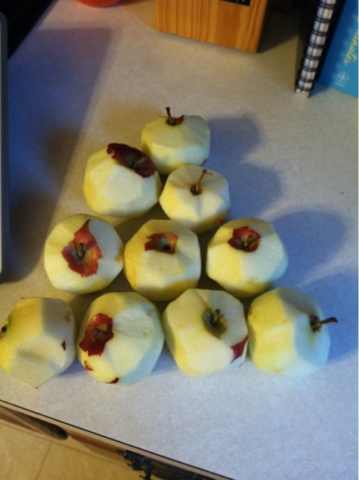
Once my gross "crumb" topping was created, along with a cornstarch mixture, I peeled 9 apples. Then, once I realized that my triangle was not complete, I peeled the 10th one to top it off.
Once the apples were peeled (sorta), cored and cut, I threw it all into the Crock Pot. I tossed in the cornstarch mixture along with some apple cider vinegar (it calls for lemon juice but I don't own it), then topped it with my "crumb" topping.
From there it was just a matter of turning it on and letting it go - which is the absolute beauty of a crock pot. Since our internet and cable were both out all night, my husband and I snuggled in for an afternoon/night of movie watching. A few hours later, we had some hot apple crisp to warm us up, since we are too cheap to turn our furnace on. Don't judge - that shit's expensive :)
 
Unfortunately, I was too busy thinking "oh please don't let this suck" while I was scooping into it to think about taking an "after" picture, but basically just imagine the above picture but fluffier. The result? It was actually pretty dang delicious. Put delicious along with "ease of baking" and you have a perfect dessert for this girl.  
 
The original recipe can be found at www.keyingredient.com (link is on my Pinterest), but I'll type it out for you because I'm nice like that. Plus, I still feel bad about not posting yesterday.
 
Ingredients:
1 cup flour
1/2 cup light brown sugar
1/4 cup white sugar
1/2 teaspoon ground cinnamon
1/4 teaspoon ground nutmeg
1 pinch salt
1/2 cup butter, cut into pieces
1 cup chopped walnuts (I used almonds, which I just had on hand)
1/3 cup white sugar
1 tablespoon cornstarch
1/2 teaspoon ground ginger
1/2 teaspoon ground cinnamon *yes, again. don't judge it, just do it*
6 cups apples, cored peeled and chopped
2 tablespoons lemon juice (apple cider vinegar turned out okay, I guess)
 
Directions
1) Mix flour, brown sugar, 1/2 cup white sugar, 1/2 teaspoon cinnamon, nutmeg and salt together in a bowl. Combine butter with the flour mixture using fingers *I used my fingers. Not recommended. It's messy as hell* or a fork until course crumbs form *Or until you give up because it's gross, like I did* Stir in walnuts and set aside.
2) Whisk together 1/3 cup sugar, cornstarch, ginger, and 1/2 teaspoon cinnamon. Place the apples in a slow cooker, stir in the cornstarch mixture and toss with lemon juice *or vinegar, if you're a rebel* Sprinkle walnut crumb topping on top. *Or mash it because "sprinkling" was not happening with this globby nightmare* Cover and cook on High for 2 hours *that's what I did - ain't nobody got time for 4 hours on low* or Low for 4 hours, until apples are tender. Partially uncover the slow cooker to allow the topping to harden, about 1 hour.
 
This is where I may or may not have messed up. I was unsure what that last sentence meant - do I uncover it for the last hour of my two hours, or is this another hour on top of my two hours? Do I turn it off? Tell me, recipe, tell me! But it didn't, so I just uncovered it after two hours, shut off the cooker, and let it sit for about 45 minutes. The top didn't get crispy, but I have a strong feeling that it was not the fault of timing - I mean, did you see the above pictures of the "crumb" topping?
 
All in all, this was quite delicious, albeit not perfect, and I would certainly make it again.
 
As always, feel free to comment below or send your thoughts, ideas, complaints and refashions of your own to thriftysew@gmail.com.

Technical Difficulties

Happy... Monday? Is there ever such a thing?

Last night, in the middle of prepping for my post, my internet went down. Currently, it is still down and I am posting at work (naughty, naughty).

Once my internet is back up and running, I will be sure to post Sunday's posting as soon as possible. Sorry for the delay.

You can go ahead and blame Time Warner Cable for not being able to read about the majestic-ness that I created last night. It was even *teaser* completely different from what I usually write about!

Sunday, September 8, 2013

A Little Goes a Long Way

Happy Sunday! It's back to football season, so I'm enjoying my new Sunday schedule of sewing and writing up my blog while watching football and noshing on food that's not good for me. I shouldn't make it a habit, but... I'd like to :)

A chill is in the air and summer is certainly winding down. According to the weatherman this Tuesday and Wednesday are going to be in the high 80's so since Mother Nature decided to go out with a summery bang, I figured it wasn't so bad to do just one more summer dress.

I started out with this:
This certainly wasn't the worst project I've picked up, and as I'm sure you can tell from my title that I really didn't do all that much for a nice update. I like that I don't always have to do a drastic overhaul to make things new and wearable again. I like when I can just do a few tweaks to make it my own and still keep the idea of the original designer. It makes me feel like they wouldn't be horribly mad at me for screwing up their design too badly.

There was certainly something that had to go, and it was this collar.
I'm a huge fan of lace, which is what drew me to this project in the first place. However, extraneous, itchy, tall lace around my neck that creates a mock-turtleneck is not in the cards for me... ever.

Seam ripping out the collar panel was a quick and easy job.
Next, I brought my attention to the lace details on the chest. As mentioned, I'm a fan of lace. I'm also a fan of ruffles (in small amounts). Lace ruffles? That's just too much. Luckily, the two lace ruffles that went down either side of the chest was added on as an afterthought by the designer, and were easily removed without messing up the rest of the lace on the bodice.

All in all, this was all that was removed.
Then I turned my attention onto the skirt. My first thought was to make it a high-low hem, so I put the two side seams together and put down my ruler to see how drastic of an angle I wanted.
Obviously, my ruler is more than lacking for this task.
Besides having a pretty useless ruler, I was very unsure about this high-low. I love the trend and think it looks good.... on other people. On me? I'm too big of a wuss to find out. Plus I'm a sucker for a circle skirt and this was a perfect one.

So I just decided to bring up the hem an inch or so because it hit me in a weird spot right below my knee. As I plan on wearing this dress to work, I didn't want to go to short with it, but still wanted to keep it flattering.
 
This is where I cheated just a little big time. The original hem was just about one inch, so I used it as my guide to roll it up and pin it down. This way, no measuring was needed and the bottom hem looked nice and neat. All it needs after I wash it is a nice ironing to make sure it stays put.
All in all, not much was done to this dress but I think the small tweaks was a vast improvement on the overall look. This just goes to show that you don't have to be a master of sewing (or really, know anything about it) to make a dress your own and tweak it to be flattering for you. Just a cut here, rip there, and a few pin stabs (it happens!) and you've got yourself a classy dress that you can now say " Thanks! I made it" (and whisper "sort of") when people say "Hey I love that dress!"
 
Here's a close up of the nice, clean lace-turtleneck-free neckline.
Note to self: Let's look more presentable in the next project, k?
As always, comments are welcome and e-mails to thriftysew@gmail.com always make me smile. Enjoy your football, or whatever else you choose to do on this gorgeous Sunday!


Sunday, September 1, 2013

Thrifty T's

Happy Labor Day Weekend :) This weekend is a holiday in the US and so we have a nice long weekend to celebrate our labors -- by doing nothing. I enjoy it :)

It's also a big weekend in Syracuse, where I live. Around these parts, Syracuse University sports reign and yesterday was the season opener of football. Back in the day, we (as in Syracuse University) were "da bomb" at football - football legends such as Jim Brown and Ernie Davis took over the field. Now... well, not so much. Things aren't going well for Syracuse University, but that doesn't stop my husband, an alumni, and me from being orange-blooded fans. So, in Syracuse Orange spirit, I wanted to create a dress using the SU colors while rooting on my team.

Who would have thought finding an orange dress at the thrift store was so hard? But I didn't let it get me down - this is what I chose.
That's right - two t-shirts! I must be out of my mind, right? Well... only a  little. These were a steal though. Both were white tags, which conveniently were 50% off the day I bought them, so I got the blue Aruba shirt for $1 and the orange shirt for $1.50. A $2.50 dress was certainly looking good for my budget!

The first thing I did was cut off the top of the blue shirt where the Aruba picture was.
Next, I took the remaining tube of blue fabric and matched it up to the bottom of the orange shirt and cut it roughly the same size. I made sure to cut on the seam so when I sewed it back up the seams would all match. I also learned my lesson and left a seam allowance so I didn't end up making it too small when it was ultimately sewn up.

Then it was to the sewing machine to sew up the cut and make it back into my tube. I did mess up a bit here. I used a short straight stitch that bunched the fabric up like crazy. I didn't rip it out because I had places to be, people to see. I struck it lucky because it actually worked out to be unnoticeable. In any other case, though, I would have ripped it all out and re-sewn it with a longer zig-zag stitch.

After this, it was just a matter of putting the blue tube around the bottom of the shirt, inside out and upside down (with the orange shirt right side out) and sewed around the bottom. I made sure this time to use long zig-zag stitches, then went around a second time with short zig-zag stitches. This kept it from bunching but it was stretchy enough that I wouldn't blow our the seams when I put on the dress. when the bottom was all sewn, I just pulled the tube down at that point and I had my SU themed dress!
Let me tell you - this is possibly the most comfortable dress I have ever worn; probably because it was made from two super comfy cotton t-shirts. It was also a hem-free project, as the bottom of the blue shirt is the bottom of the dress. I highly recommend making a t-shirt dress. I also made sure to make it a bit longer, so when I get all jumpy and nuts while cheering on my team I don't get all R-rated in the crowd too.
 
However, when the game is over and we are hopefully celebrating a win, I can jack it up for a night on the town celebrating.
As always, feel free to comment below or shoot me an e-mail at thriftysew@gmail.com :)
 
Enjoy your holiday (and your football!)