Thursday, March 28, 2013

Sailor Peplum

Ahoy mates! Welcome to Thursday!

Interesting things have been going on, friends, which is why my post, while still posting on Thursday, is barely making it before the bedtime mark. I'll be able to update soon on the recent interesting happenings, but I thought a teaser explanation was appropriate.

Why the "ahoy"? Well, it's only appropriate for a totally sailor inspired dress!


No surprise as to what brought this baby from rack to register - it's my color palette. I'm on some kind of "no nautical left behind" kick, I think. This one sat on my clothes rack for a while as I had no ideas on what to do with it. I at first decided to cut off the bottom for a dress, and then use the top as a (gasp) top. That just didn't scream "learn something" to me. So I browsed the internet and I discovered the peplum fad. (See here if you were as out of the loop as I was.) Adding volume around one's spare tire is usually not ideal, but apparently it's a train the general public has been hopping on with gusto. I'm nothing if not experimental, so I tried it out.

First thing I did was take of the ruffle from the bottom. The goal was to re-place the ruffle up around my natural waist, where typical peplum styles begin. At first I was a bit worried that the ruffle would be a bit short, but then I discovered about 1 inch of the blue fabric inside the dress that I could use to add a bit of length. I was pleased... until I went to remove it.

Yup. That's the big ol' hole that removing the ruffle left. Apparently, the extraneous inch of blue fabric I found in the dress was just that. Oh well. I had an idea, and it was my only one, so I rolled with it.

Once the ruffle on the bottom was removed, I took the seam ripper to the shoulder pads. All 4 of them. (Giggling ensued)


Next up was the task of making the ruffle fit to my waist. As it was originally the bottom of the dress, I had to take in a few inches on each seam of the ruffle. I've gotten into the habit of sewing a straight(ish) line where I want the hem, and then doing a zig-zag stitch near(ish) that line on the side that I plan on chopping off. The idea is that it keeps it from rolling and falling apart. Not sure if it works, but again, we're rolling with it.


Bad picture, yes. This is one of the seams of the ruffle and if you look thisclose to the picture, you may see my new seam that I did (in line with the pin). I then cut off the extra fabric to the right of it.

Next, I put on the dress and marked where my natural waist was so I knew where to start the ruffle. I then kept the shirt right side out and turned the ruffle inside out around it and pinned it up. In hindsight, choosing a striped fabric was absolutely genius because I just picked a line and pinned the ruffle to that line. It also helped when I was sewing it all up. It kept me in a straight(ish) line. Don't ask about the ish's - this is still just practice; stick straight doesn't happen yet.


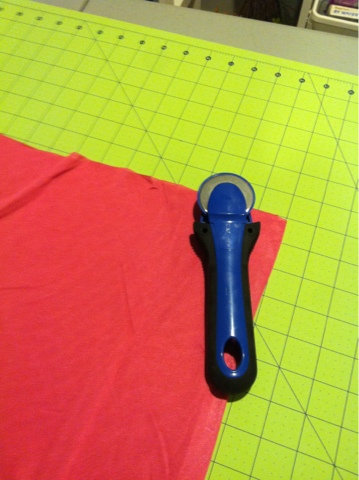
Once that was sewn, I cut off the excess blue and white striped fabric underneath the peplum. I made sure to do this all in one big cut so I had a good amount of nautical fabric that I can use for something later.

Next up was the arms. At first, I just cut it to a nice shoulder-length.


Then, I put it on and discovered that the shoulder pads that I had initally cut out actually had extra fabric built into the shoulder in order to accomodate for said shoulder pads. Therefore, I had a big poof directly on my shoulder that I had no idea how to get rid of. So, as much as I said I'd stop doing this, I seam-ripped the arms right off and went the sleeveless route.

The end product is not something I'll probably wear a lot. I don't think the peplum style is quite what I would call "mine". Maybe a few more months at the gym and I'll revisit it, but for now, it was pretty fantastic practice. I especially learned a ton when I put the ruffle around the waist of the shirt. It was quite the job making sure it wasn't too big or too small that it would make the waist look weird. I'm very glad I practiced this - I see many a dresses and shirts in the future that I will put to use this new skill.

As for the final result - this is my "it's not that bad, is it?" look! Although, I think with a thin red belt around my waist where the peplum begins may be kind of kick-ass for Independence Day, heh? Right? Get me? Got it? Maybe?... Oh fine. Just check it out.

Thursday, March 21, 2013

Purple Passion Refashion

Happy Thursday! How's that for follow through on promises?

I found myself another muu muu. (For a refresher on the first one, click here) With this choice, I'm pretty sure I was channeling my mother with the purple. The color brought me in first, the muu muu brought me in for further inspection, and the fun flowers nailed my decision: I had to have it. The fact that it was $2.50 had a certain appeal as well.


It was a massive dress (with pockets!) that got me all sorts of excited. First thing I did was seam rip the arms off. I know, I know - I always do that, but I had goals of making this a summer dress to bum around town with so shortsleeves was a necessity. Also, the fabric was a bit thick for summertime so a little editing was much needed for summertime comfort.

After taking off the sleeves, I threw the dress on Sophie inside out so I could pin the sides and take a lot of the width in. This was - and I'm going to try to avoid the many, many swear words that were coming out of my mouth during this task - pure hell. I took it in a few inches on each side while trying really hard to keep some pocket in tact. Too big. Then I took it in a bit more, sacrificing the pockets. Too small. It was like a real life Goldilocks going on in my craft room. Finally, I found my happy medium and sewed up the sides. This, unfortunately, took out a lot of the draping, but after so many times of seam-ripping, one tends not to give a dang about draping.


Once the sides were finally at the right spot, I moved onto the neckline. I made a nice hem all the way around the armholes and around the neck and sewed everything up. On one side, I kept stopping and starting and skipping over the places that didn't need to be re-sewn. On the other side, I did one fluid seam, resewing the manufacturers spots even if it didn't need it. As it didn't really make a difference, I decided that one fluid motion was better - not because it looked better, but because when I get into a groove, I'd rather just roll with it.

Lastly, I decided that I would cut the bottom off to a length that wasn't quite so matronly. I picked a spot on the bottom of the dress that was a good length, and chopped it off about an inch below that length.


This is where hell rose again. I tried to do the hem that a sewist is supposed to do by rolling up the bottom edge and then rolling it again in order to make the inside all nice and neat. This did not go as planned, as it kept on getting unpinned, rolling under itself while I was sewing, and generally being a huge pain in my side. Eventually, I decided that it wasn't worth it and no one was going to crawl up my dress and inspect the seams on the inside, so I just rolled up the bottom edge once, ironed it (you heard me - I actually ironed) pinned it and sewed it. This went much better and no one would know the difference.

I used the bottom portion that I chopped off for a sash just incase the dress was too billowy that it needed to be sinched. I cut the bottom into one long piece, then folded it in half lengthwise, making sure to put right sides together (learned that one the hard way.) Then I sewed it all up and turned it right side out into one long tube and sewed up the ends.


So this one didn't quite turn out as I was hoping. I enjoy the neckline, the pattern and the color, but I'm not entirely convinced on the length that I made it. At certain angles it looks a bit nightgownish. The sash didn't quite work out as planned either - it made the dress awkwardly short that I knew I would never wear it.

Final product?

Upon further inspection, I actually noticed that I had totally messed up one of the side hems (not a surprise, really, when you think of how I did the seam 3 times and was pretty frustrated by the time I was done) to the point where it was bunching to be even shorter. I also found a few holes on the sides that were probably made during my side seam-ripping fest. I think I may re-visit this refashion when summer gets a bit closer. If I wear it as is (it is really comfortable!) then I will leave it as is and fix the holes and re-sew the weird side. If I don't feel comfortable wearing it as is, I'm going to chop it off at the waist and make it a pretty flowy blouse.

Win-win? We shall see.

Wednesday, March 13, 2013

Pillowcase for a Cause

** BREAKING NEWS** Regular blog post day has come upon us. I have made the decision that Thursday nights will be THE. NIGHT. for new blog posts. Check back every Thursday for a fantastic new redo, remake and/or refashion! Now back to our regular programming...

Sad news - no before pictures today! But there is a reason for that: I'm sewing for a cause tonight. I stumbled upon this site that had a charity drive of pillowcase dresses going on. I'm all for charity - I used to volunteer lots and lots of my time when I had lots and lots of time to spare - so I figured one that crossed charity and sewing just absolutely had my name on it. Basically, this little girl and her mother help out Uganda's children effected by the war as much as they can. On this next trip to Uganda, this girl is collecting pillowcase dresses for both the little girls that she has sponsored, as well as the other little girls in the villages in which she visits. This girl is pretty amazing to have suchy a caring outlook on a world that isn't always a fantastic place. Kudos, child, kudos.

After reading about her mission, I went right out and bought some cheap pillowcases at the dollar store and some ribbon on sale at Joanne's. There are a lot of tutorials online for pillowcase dresses so I wanted to do the first one at low-cost in order to really get the hang of it.. I picked up some pillowcases that were in "micro jersey" and knew that jersey was stretchy i.e. the perfect fabric to stretch and move with active little girls. Well, it turns out my idea of "micro jersey" and the manufacturers version of "micro jersey" are very different because this fabric was very thin and very see through. Unless this dress was going to be for a girl who participates in corner-like activities, this was not something I was sending to Uganda. I decided I'd use it as a template, see how it's put together and figure out the measurements.

First up, I cut off the end of the pillowcase that was closed shut to make a large tube.


Next, I measured the u-shape for the arms. Not having kids myself, I had no way of measuring, so I just kind of guessed. Turns out, I guessed wayy too big. I did the armhole 4" across and 5" down. It probably should have been 2" across and about 4" down. I'll know for next time. I then folded it in half and cut the u-shape through all four pieces, making sure they were all even.

Okay, I lied. I actually didn't do that, but that's how you should do it. I cut both sides separately before I remembered this little gem of advice, so when I actually did fold it in half, it was way uneven and I ended up having to cut it all again.


I then pinned a hem on both the u-shapes, the front and back panel, and sewed it up.

Okay, I lied again. I knew this was practice so I didn't create a hem on the front and back panel. Again, though, this is something you should do.

Action shot!
 
You may be asking "why the heck is she using black thread?" And that is a fantastic question. In all honesty, I did it because that was the thread/bobbin that was already in my machine. In the end of the project, it did actually make it easier to tell what I did for when I make future ones. Also, for the benefit of this blog - all the black stitching will show where I sewed in case you want to do one too and I've accidentally left out describing a step (or two).
 
For the front and back, I folded the top down into a casing a little larger than the thickness of my thread. In the below picture, you can see where the black thread is dark at the beginning and ends of my stitching - this is because I always backstitch a few (probably too many) stitches whenever I start. Unless it's a stitch that you want to break, it's always a good idea to backstitch each time. Otherwise, you'll have some unintentional poppage going on somewhere.
 
Then I took my high-tech safety pin and put it on the end of my ribbon and brought it through the front casing. Repeat on the back side.
 

If it wasn't see-through, the measurements that I ended up doing would actually be a pretty nice summer shirt for me. Alas - it is see through so you'll just have to look at good ol' Sophie sporting it.

 
So that is my own little how-to on pillowcase dresses. I do hope I've inspired you to go to the website, check out the cause, and get involved. It is fantastic practice for other sewists (not sewers... never sewers) like me, and surprisingly quick and easy to do. I definitely plan on doing more and sending them to Mallory to bring to Uganda for the little girls. I'll be sure to photograph the final package!
 
See you next Thursday!

Tuesday, March 12, 2013

Spice Rack Labels

So I have a confession - this post has nothing to do with sewing. My last problem-solving post created an itch - an itch to solve all my problems on the cheap. What problem did this bring me to? My spice rack. I became the new owner of this old spice rack about 3 years ago. I was moving into the apartment and I thought it would make me look like a real chef right there on my counter for the world to see.

The problem? I never used it. It still had the old spices from the first owner, half the bottles didn't have labels, and most of the spices didn't actually come out of the bottles becasue they either created moisture and were stuck in there... or they were just too old to move. I searched and searched for labels that would fit the tops to no avail. So, this spice rack just followed me around from the apartment to the house, sitting uselessly on the counter.


Along my Pintrest travels - I came up with an idea. Chalkboard paint! I've been craving to use chalkboard paint for a long time. Pictures of grocery lists and cute, changeable sayings on my walls floated in my brain. Finally... I had a chance to put this in motion.

I went to Lowe's and the smallest container of chalkboard paint I could find was a quart. A quart was way more than I needed, so I guess I'll just have to use the rest of it for something else... oh darn *cue the sly smile*. This sucker was very specific on its needs - it needed to be painted on metal or wood with a brush of polyester bristles. So there I was, in Lowe's, staring at too large 2" brushes, none of which were screaming "I'm polyester!", with full intentions of painting my plastic tops. We're off to a great start.
As I'm pretty much on a first name basis with Joanne and her fabrics, I went there to see what could happen in the craft aisle in the way of brushes. After my sheer astonishment at the prices of single paint brushes wore away, I finally picked up a $3 dollar nylon brush. I had a 40% coupon so I didn't pay too much... and I was done with trying to find polyester. I figured nylon and polyester were both clothing fabrics, so they must work the same good enough.

First up, I removed all the tops and cleaned them off. I also removed the labels of the few that had labels left with some hot water. There was a bit of glue left over on the tops but no big chunks that the naked eye could see. I then set up shop in my dining room, as the weather was absolutely gorgeous for New York in March (in the 60's!) and the windows in this room are huge. It's kind of like being outside.
I then made sure to throw out all the old spices and wash the small glass jars as well. I did this bartender style - set up one sink of hot, soapy water and the other with a rinse and then just shook the hell out of the jars in each sink. Worked out pretty well, and didn't leave a residue. Too bad this doesn't work on the rest of my dishes.


I then painted all the tops with the chalkboard paint. I didn't do the sides because I wanted to keep those as my gripping areas. It took quite a few coats to get it the pure black that I was looking for and not seeing any white plastic show through. Don't worry, I wasn't bored waiting for the paint to dry (3 times). Extreme Couponer's on TV kept me company. Man, I'm way impressed with that show.

Once I had all the coats on, I noticed that I wasn't exactly "neat" when I painted the tops. There were globs of paint going all down the sides. I then turned to my craft room. Realizing I didn't have any small ribbon to line the sides, I did notice that I had plenty of washi tape leftover from our wedding that I had full intentions on using but never actually did. They fit the sides perfectly! I lined the sides with the tape, went around twice because it was see through, and called it a day.

I was pretty impressed with how it all turned out. I think sometime in the future I may replace the washi tape with some actual ribbon - even going around the top twice you can still see the drips, drops and globs of paint on the side.

At this point, I realized that I needed some chalk in order to actually fill the jars and know what is in them. So, back to my craft room I went. The only chalk I could find was the chalk that I use to mark cut marks on clothing, which is short and fat - but I rolled with it. My writing could certainly be neater, and I'll have to invest in a chalk pen with a finer tip but, all in all, it's slightly legible and certainly serves its purpose for now.


Next up - I promise some sewing refashions from something really ugly from the thrift shop!