I've challenged myself to taking thrift store finds and making them fashion wearables or new home decor. Whether it turns out to be a mess, or a surprising success, it'll be here for your enjoyment (and my closet).
This week there is no clever "Before" picture. In all honesty, I'm having quite the lazy Sunday and didn't want to spend time showering, getting dressed, putting on my pretty face... it was just all too much for today. So I turned my attention to the piles and piles of scrap fabric I got a bit ago from a lady cleaning out her craft room.
I couldn't help but be drawn to a rainbow fabric. She gave me a ton of it, and I had no other thoughts as to what to do with it other than to test out a few ideas. What girl couldn't use another tote?
I cut a large rectangular piece of fabric, and two strips about 3 inches wide for the straps.
I paid attention to the straps first. I folded them in half first, and ironed that down. Then I opened it up and took the left half and folded it in half again, and repeated the motion on the right side, essentially making my own bias tape. I made sure to iron down all my folds. There was a quite a lot of ironing in this project. I wasn't excited about that part.
I then folded it on top of itself and sewed it down to create two straps. I only sewed down the one side, but in my professional opinion (ha ha), those of you that choose to follow these steps should probably sew down both sides. It would definitely look better.
Next, I folded down the top of the bag and ironed it down. I then folded it down again and ironed it down again (see a pattern yet?). I tucked the straps under the fold and sewed it down.
Next, I folded the strap back up and sewed it down again. I should have ironed this down first too, but in all honesty I was over the ironing thing. I had already had the iron on longer at this point than it has ever been on before.
Next, I kept the right sides of the bag on the outside and sewed down the sides. That's right - right sides out! *GASP* I'm sure all you real sewists are freaking out right now and yelling "That's not the way you do it!". But... hold that thought friends - I have a plan. (And since this is finished now, I can actually say with confidence that my plan panned out and worked. It's not something I can say very often.)
Only then did I turn the bag inside out. I ironed out the seam to be flat and then sewed down the sides again. I made sure to sew down the inside of the edges of the seam (that was now on the inside of the bag).
This resulted on a French seam, so the outside of the bag was nice and clean and the inside seam had no raw or rough edges. Boom.
I was quite amazed that this turned out how I pictured in my mind. And now that I have it, I'm actually quite excited about my bag and how good it looks. I also adore the rainbow pattern - it is nice and bright, something that is well needed in this world of white that is January in New York.
I now have a great tote to carry around books, folders, groceries, whatever I feel the need to carry. And, because this has no lining or inter-facing, it is not stiff or bulky so I can roll it up and use the straps to secure it.
I plan on making a lot more. It was a quick and easy project to get my scrap fabric out of my craft room and turn it into something useful. Maybe I'll put fabric in it...
Enjoy your Sunday, friends. I have found myself a new book series and have been wrapped up in it all weekend, so that and a glass of wine is my near future. I encourage you all to do the same!
Happy Sunday all! Ever have one of those days where you just want to take it easy? That was my day. I'm getting over a cold that has left me exhausted and congested, so I decided to keep this one easy. To the point where 75% of it is no-sew. Non-sewist's rejoice!
This week I went through all my drawers for all my super comfy clothes to lay around in. The answer is yes: I am pathetic when I'm sick. Much to my surprise, I found a drawer of t-shirts. A whole drawer. Of t-shirts. Ones that I haven't worn in years. I know this because they have years on them - 2005, 2007, 2008.... it's just embarrassing how I've squirreled these shirts away. I found myself on Pinterest soon after, looking up easy ways to refashion shirts. Without further ado... here are my findings, and my attempts.
We'll start with the easiest one. And rock my alma mater. Yes; we were the Kangaroo's. It happened.
Do not judge on the pose, the hair, or the face. I finally got a new camera and didn't realize how well it picks up details such as my just out of the shower hair or my no-make up'd face. It'll be fixed in the afters.
My main focus for these t-shirts was to go to tank tops and summer shirts. I'm getting a bit of cabin fever, so I wanted to do a small prep for summer. I made two cuts:
And that is literally it.
Next up is a t-shirt I got at the 5K for my job. Although I'm proud to wear a shirt that says I'm recovering lives... the weird bubble made it so that I will never wear it. Ever. Chopped it will be!
I made five cuts on this one. Three are rather obvious; the arms, and the neck. The fourth and fifth cuts are to open up the shoulders so the front and back were separated at the neck.
Then, I tied one of the shoulders together, as such, and made one additional cut to the other sides armpit to make it a slightly larger hole.
Then I put the shirt on, pulled the other shoulder's ends to the side that was already tied, and tied them up to. Ideally (and in real life) the first knot is off the shoulder and the second is on top of the shoulder to create the "cut out" effect. I didn't catch that effect on camera. (Camera fail)
Next came another alma mater shirt. I just can't get rid of these shirts, despite the fact I haven't worn them in 6 years. This project came with a bit of sewing.
I started off with the three cuts that pretty much every t-shirt refashion on the internet ever starts off with.
Next, I folded down the front about an inch, and did the same with the back, pinned it down and sewed it up. These will serve as a casing for my straps.
Next, I deconstructed the long sleeves to create two tubes as straps, and fed them through the casing using the trusty safety-pin maneaver.
From there, it was just a matter of sewing the ends together.
This next one made me want to make a gym shirt. I have been going to the gym pretty frequently and have been in the market for some gym wear. All I've found are super tight lycra, low cut tank tops or unflattering shirts. When I saw this old Planet Fitness shirt in the drawer, it got my gears spinning.
Unfortunately, I have zero pictures of the process. Basically, I cut off the arms, and cut off the collar. I made the front neckline rather modest, as one of my pet peeves of gym-wear are the low necklines (who could possibly be comfortable working out when you're barely staying in your shirt?!). On the back, I cut a large, long scoop to just about the middle of my back. I then tied together the straps with some black polka dotted satin ribbon I had laying around.
The front looks like a regular ol' tank top, but the back is now a lot more interesting. I put this on over my sports bra, but I would definitely put a tank top underneath for the gym - a bright color that will pop.
So that ends it for today. Four quick t-shirt refashions that I completed in under an hour. Not all of them are glowing successes, but it certainly opens the mind up to a lot more possibilities than a boring old t-shirt. I encourage you all to open up your t-shirt drawer (I know you have one!) and cut away. Feel free to send me the results (thriftysew@gmail.com).
Happy Sunday Funday friends. Today''s project comes from a purchase last night. I had my family over to celebrate my 6th Annual 21st Birthday and brought them all to Salvation Army. Don't I know how to treat them special?
We had a good laugh, for sure, and I found myself two garments rather quickly that had potential. Today's was found for $1.50 (thank you, half off blue tag)
First thing I did was remove the dreadful shoulder pads.
This fabric was a nice sweatshirt like material, so my initial though was to cut it off at the waist and have a short sleeve, overly large sweatshirt. I got out my rotary cutter and went at it.
Soon after it was cut, I put it on and realized I made a crop top. This, folks, would not work - mama doesn't do crop tops. Crop anything, really.
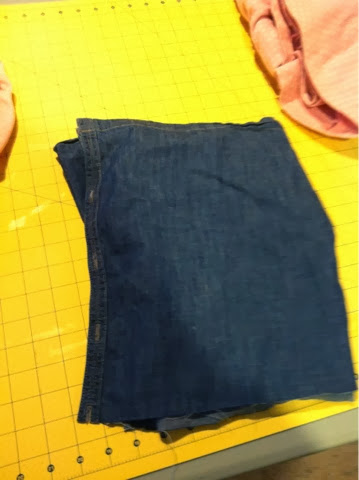
I looked around for fabric that I could use to make it longer. I found tons of fabric that wouldn't work, such as tulle, patterned, silk, lace... all of which would have just looked off. Finally, I found a scrap from my denim dress refashion when I made my own chamois shirt. This would work perfectly.
I took the two ends and put them together to create a loop. Then, I sewed up the seam to take care of the edges from the skirt and take out the part with the button holes. Voila.
Next, I took my loop "skirt" and bubblegum pink top and put them together. I pinned it up, and sewed it down. See what's happening now?
Once it was sewn up, I pushed the dress down and had my own dress. It is more of something that I would put over leggings, but as all of mine are currently in the wash (laundry day should probably stop being the same day as blog day) ya'll get to see a bit o' leg. You're welcome.
By the way, I'm sure you've noticed that I am now taking pictures in the mirror again. Hopefully this will be the first in a long time and the last forever. My camera is on the fritz so I am now on the market for new. Any suggestions?
(As always, had to throw a belt on it and jack it up!) The more I look at it, the more I know I need to do something else with the top. I'll probably continue playing with this one. It's not the most stylish thing I've ever made (far, far from) but it is pretty comfy. BONUS: I still have the entire skirt to play with.
Let me know your camera suggestions in the comments or, as always, feel free to e-mail your boo's, hisses and praises to thriftysew@gmail.com
Happy Sunday Funday all! I am certainly feeling more cheerful now that the weather is looking up and is above 0 degrees farenheit- always a plus!
Today, I decided to do something to my craft room that I've been meaning to do for quite a while now - an inspiration board. I've seen this on Pinterest many times and it always seemed to me like a good idea. So I got to it.
Now, here's the before:
Yup, it's a wall. A very boring, very plain wall. I thought it needed some spicing up.
I got together my supplies, which includes fabric remnants from Joann's (about a dollar a piece) and some cork board. I found this set of four at Joann's for about $3.
Next, as these fabric remnants spent the last 4 months in a bag on my craft room floor, I had to iron out the wrinkles.
Once ironed, I laid out the fabric on the floor wrong side up and set the cork board on top of it. I then cut around it, about an inch on each side.
Next, I folded up the edges and, making sure it was tight, stapled down the four corners. Make sure when you staple that the edges don't go all the way through to the other side. Mine went through all of the cork, but did not go through the front fabric, so that worked fine.
Next, I took my hot glue gun and glued all the way around the edges to make sure that baby stayed tight and didn't pucker in front.
From there, it was just a matter of using the sticky hangers that came with the cork board to affix the board to the wall. You can do this in whatever pattern you would like - I went for a plus sign to get a little positivity to the place that I often find myself swearing like a sailor. Now, I can hang any sewing ideas, instructions, inspiration pics, etc. right there in front of my face. I figure this may be an easy way to remind myself of my New Years resolutions as well. Bonus.
I was super excited for this New Year to start - not because 2013 wasn't good, but because I'm over this snow thing already. Bring on March and April, when the sun comes out and flowers start poking up, if not in the ground then definitely in stores. Yes - I am writing this as we are receiving a sweet snowstorm. Awesome.
There's no refashion today because, well, I'm at work (shh don't tell!) but I wanted to revisit last years resolutions and see how I did. Additionally... let's make some more!
Here's last years:
1) Work off all the post-holiday extra poundage.
RESULT: ehhhh not so much. However, I did get much healthier and can run a lot longer and harder than I did at the beginning of last year, so I'm going to call this a win.
2) Experience Syracuse.
RESULT: Win. I definitely got out a bit more - not as much as I could or should have, but definitely did more than I used to (which wasn't hard to do more than nothing, really). I also got out and experienced a lot more places - Rochester, Boston, Cape Vincent, Limerick... "gotta catch 'em all!" (No, I didn't watch Pokemon but yes, that sure is a reference to it.)
3) Find more thrift stores!
RESULT: I did super well at this... in the beginning. Then it was back to my trusty ol' Salvation Army. Half of this reasoning is that I don't want to explore Syracuse and end up in the "bad" part and get shot at... which coincidentally is about 80% of this place. So, there's that.
4) I want to post projects on a more regular schedule.
RESULT: I've certainly set a schedule (hey there, Sunday Funday) but I wasn't all that fantastic at regularly posting on it. You may see a repeat in the New Year's list.
And last but not least... here's this years list!
1) Continue the path to being healthy. I've certainly realized that losing weight does not necessarily mean getting healthier - so I'd like to continue my running and lifting routines. If I happen to lose weight, that's great, but my goal is to just continue to have excellent physicals and not breathing embarrassingly hard on walks up the stairs.
2) Take better care of my skin. I admit - I go to bed with makeup on, rarely wash my face in the mornings, led alone at night, and I am seen sorely infrequently putting on sunscreen of any sort. It's not that I didn't know all of this was bad for my skin, I just didn't care because I am young and bulletproof (obviously). Only recently have I begun a routine of washing my face in the mornings and at night and using moisturizer, and it's pretty scary how my skin has improved in just the few weeks I've started. I would love to see what I would look like had I been doing this all along, but now will only see improvements from now on. Take note, children.
3) Post more frequently. I would love to do more than Sundays, but I'll start out by getting on a permanent schedule of Sundays and then work to adding some throughout the week. I don't like letting ya'll down.
So, that is it for now. I don't like to go all crazy making promises to myself because you and I both know that promises to yourself are the hardest to keep. I also think that improving yourself and creating habits can happen any time throughout the year - New Years Resolutions be damned - so feel free to see this as a jumping off point. I encourage you to do the same!
Enjoy your New Year, make it the best and baddest, be crazy, make your own happiness and all that jazz. Meanwhile, while you're doing all that, feel free to take a break and check out my "Before And After" page. I've updated all the pictures, and in the next week or so will make all the pictures a link to the post that it coincides with. That way, God forbid you miss a post, you can always go back to the Before and After page and be able to easily find it. How's that for a how-do-you-do?
I will close with this: Hi Aunt Cheryl! :) Thanks again for reading all religiously and such - I very much appreciate it.
Unfortunately, my Christmas plans for the weekend fell through when Mother Nature decided to drop an ice storm on the in-laws. The roads were a complete mess and they lost power for more than 24 hours. In result, we did not go home and were not able to have the family Christmas this weekend. Luckily, we are all getting together on Wednesday (Christmas day) and spending time together. I'm certainly glad we didn't skip it, and even more glad that the ice storm is over and the power to my in-laws is restored.
Meanwhile in my house, I am having the worst luck with everything electronic. I finally got my sewing machine cleaned up and greased so it is no longer making any clunking noises. So, I prepared for today's project and got my thrift store garments all set. I turned on my camera... and nothing. It turned on, but as soon as I pushed the button to take a picture, it turned off. Even with a change of batteries, nothing was working. Then when I sat down to write this very blog, my computeres "r" key decided to stop working. When you're doing a post aboutt a "shirt" it happens to be a pretty necessary letter and keeps it from being comparable to poo. Luckily, I improvised with a wireless keyboard and my iPad. If I lose my iPad though - I'm giving up forever.
So, since my camera wasn't working properly, I had one choice - video. So here you are - a video of me walking you through creating a shirt from scratch. And it actually worked this time, so that's always a bonus.
Enjoy :)
As always, feel free to comment below and e-mails are always welcome at thriftysew@gmail.com.
Happy Holidays, and may all your electronics work better than mine.
I've had quite the pleasant weekend, actually. As you may or may not have heard, the Northeast US got slammed with quite a bit of snow, and we certainly were not missed. Luckily, it was the weekend so we didn't have to go anywhere. We took the opportunity to hang around the house and get some relaxing in before the holiday rush. It wasn't all too bad - we snowblowed the driveway twice and all together got about a foot of snow. I've had worse.
Because of our nice, quiet weekend, I had plenty of time to work on projects. I went thrift shopping and also got my project done. That's where the stress-free weekend ended.
I started with this fishy masterpiece:
It was a size 3X, and it may or may not have supposed to have been a long shirt. I'm still out on that one. I was inspired to buy this from all the popular printed sweatshirts/sweaters being sold lately. I know it's a fad, so I don't want to spend money on it, but I enjoy the look so this $3 dollar sensation was calling my name. Bonus: it was made of a black sweatshirt material.
First thing I did on this one was cut off the bottom panel, right under the sewn-in pockets.
At first, I thought the pockets were going to be a mess, since they were sewn in, but the large size of the dress made it simple to just pin up the middle, right inside the ends of the pockets, and cut them out altogether while bringing in the dress as well. And that's how I rock the two-for-one deal while sewing.
I used my ruler as a guide for my copious amount of pins, and followed it right up from bottom to top and also took a few inches off of the sleeves as well so they weren't quite as baggy.
That was as simple as that. I now had myself a patterned sweater to wear that I could fall into the trend AND be fiscally responsible. (I don't get to say that very often, so you just go ahead and read that last sentence over again for good measure. Go ahead - I'll wait.)
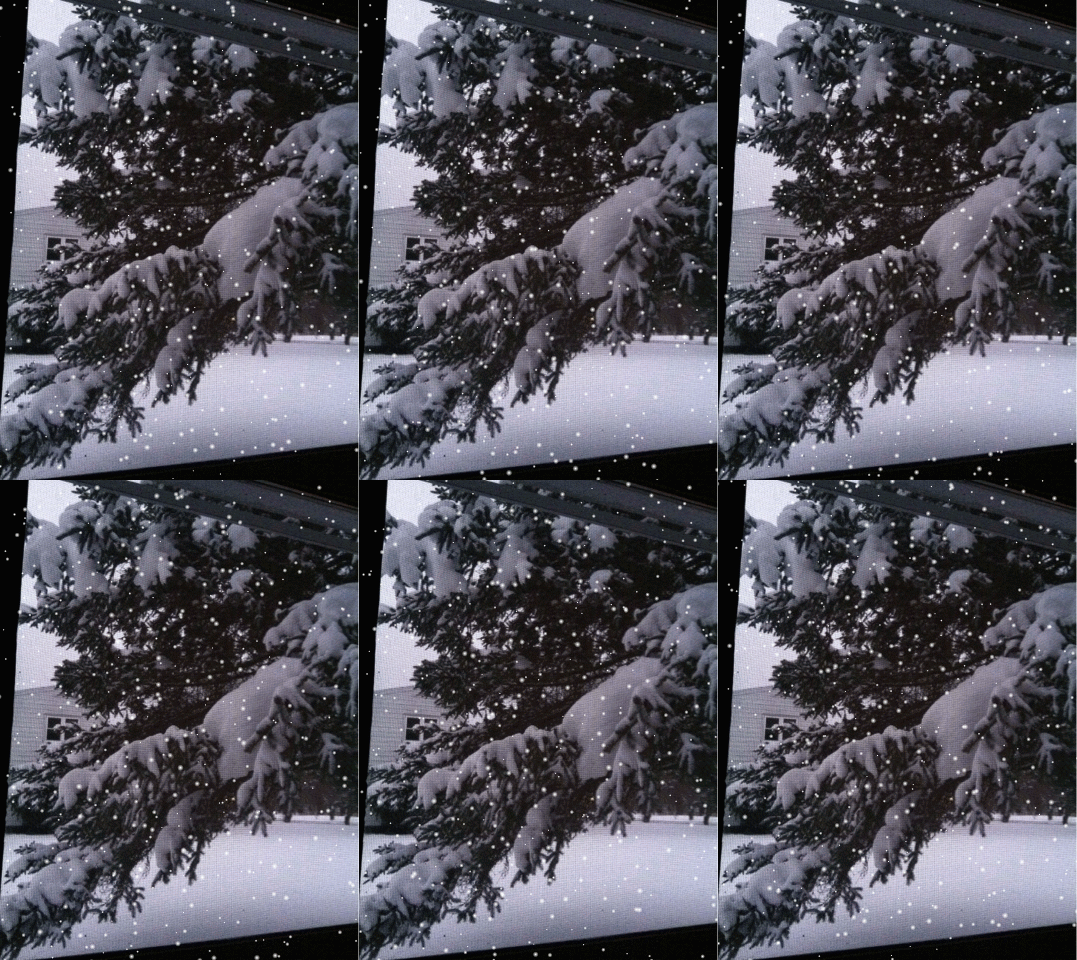
And now, for my no-snow friends: here's a bit of snowy glory for you. The snow covered trees are, and always will be, my favorite sight of all.
Don't tell me that doesn't blow your mind.
No crockpot meal this weekend folks. My apologies - I've started in on the Christmas cookie baking, so I had to have my counters clear.
However, you may have caught up on the fact that I said after my project was finished the stressful weekend ended. That is because my sewing machine is up to it's horrible game of "I don't want to work". It explodes thread. And, although funny at first, it's not becoming a fun game. It may become out of commission for a bit while I get it cleaned and tuned up. Stay tuned.
Last week, I posted a video of my 4 year old self dancing to "All Dressed Up in Grown Up Clothes" like a champ.
Let me tell you this now - it wasn't always this way. I certainly messed up. Below is a video of myself at age 11 or 12. To this day, I cringe when I hear any of these songs. I've done many a dances, and this one is still, by far, the most embarrassing in my mind.
To preface, this was a medley song that lasted 7 excruciating long minutes.
Apologies for the crappy quality- as this was a time long before iPad's and iPhones, I had to video tape this from the TV while playing the VHS it was taped on.
Anyway, getting back to it - why on earth would I post this, showing possibly the worst recital I've ever done?
Because I finished it.
Perseverance. It's a difficult thing sometimes. As you can tell from my random comments, my face got pissier and pissier to the point where you know that I just wanted to give up and walk off stage. Alas, I did not. I kept on going, from song to endless song, and managed to keep up with the other dancers while not completely breaking down.
I get e-mails from ladies who want to start refashioning but don't want to start for fear that they will mess up or turn out something that they are not proud of. Most of all my responses are: just go for it. Hang in there and go for it. The only way that you are going to know is if you try and just go for it. You may look like a fool, you may not do something you're proud of, but finishing will be a success in itself.
And, as you may have heard from my other comments in the video - I rocked it out the second night. I went right back out there on Saturday, donned in my mom-shorts and white t-shirt with lipstick stains, and rocked it.
Moral of the story: it takes practice. At this point in my dancing career I had been dancing for at least 8 years, but I still messed up. Just because I was experienced, does not mean that I was perfect.
And that, my friends, is why I post my refashions that don't work out so well right along with the (good?) ones that worked out. It's not an easy thing to do, taking god-awful garments and making them look okay, and it won't always work out the way it will in my mind - and certainly hasn't.
But - I will always get back out there (rather, in there - as in, my craft room) and go at it again. I encourage all of you that e-mail *and have the same thoughts* to do the same, whether your refashion turns out to be a masterpiece or a master fail.
My apologies for the touchy-feely-ness of this, but I believe that every now and then everyone needs a pick up or two.
This is a doozy of a post, let me tell you. This took me a computer, an iPad, an iPhone and a camera to complete and I'm still not entirely sure if I've structured it the way I wanted to. You're welcome.
So I was shopping at the Salvation Army not too long ago, and I came upon a dress that made me completely and utterly miss my childhood. First, watch this video. (Yes, it's 2 minutes long, and yes, it has the commentary of my family and I because I couldn't get it in iMovie to edit it. Fail. I get that.)
This was one of my dance recitals when I was 4 years old. I can still sing every word, and still know most of the steps in the correct order. I was "All Dressed Up in Grown-Up Clothes" and got to don my mother's dress and jewelry for this recital. I danced from ages 3 until 19/20 (college) and miss every second of it.
So, imagine my surprise when I came upon this gorgeousness in the thrift store:
I put the old school filter on this one to channel my 4 year old self. Note - don't pay any attention to the striped tank top underneath. This dress is super see through.
This dress was the same color and had the same feel as mom's dress that I used for the dance above. It wasn't exact, but it was enough for me to spend a bit more than usual on it - 4 dollars! First thing was first - remove all unnecessary shoulder pads as well as the weird flap on the chest (what is that, anyway?)
Next, I had to do something with the skirt. It was super long and as super see-through as the top, so it was quite the challenge to figure out what to do with it. Finally, I decided on a bubble skirt (channeling the tutu here). To do this bubble skirt, I folded the bottom hem up inside the dress and sewed it down on the elastic. This poof'd it out enough to be bubbly, but not overly annoying.
I admit, it does not look pretty, but this is the inside. On the outside, it looks like a regular ol' cinched waist. Win-win!
Next, I removed the sleeves. I did this for 2 reasons: 1) sleeveless is way more dancer-like and 2) they were cutting off my circulation. I don't have rather large forearms, so I thought, but these things cinched right onto them like I was hulking it up. Not pretty, nor comfortable. This is where I messed up, because I cut off the first sleeve the wrong way, so the cut was on the right side of the fabric. This made it necessary for me to hem the sleeve (when done right, this shouldn't be needed, for short-term use). Then I couldn't really go and do the other arm correctly, so I intentionally cut it wrong again and did the same type of hem on the other side. It was quite the time waster, but at least both arms look equally messed up. Score?
Paired with my leggings and a black tank top, I had a dancers dress that my 3 year old dancer self would have been super jealous of (and also my 4 year old to 19 year old dancer self - these were a hot commodity!)
Bring on the let warmers and the tap shoes!
Hope everyone had a fantastic Thanksgiving, and that you didn't get trampled on Black Friday if you were ballsy enough to go out.
And, if you find yourself celebrating Christmas (as we do) - do you have your tree up yet? We put ours up today and I couldn't be more in love with it.
I am super excited for the holiday season - I am quite the little child at this time of year, so it's only appropriate I share a bit of my childhood with ya'll today.
For today's crock pot meal: Southwest Chicken
- one bag frozen corn
- 2 chicken breasts (frozen is fine, I did it and I'm not dead) skinless, boneless and all that jazz
- 1 can black beans (drained and rinsed. if you don't it's gross)
- 18oz salsa (I used mild, but medium may give a bit more pop)
*Note* I ended up using a half bag of frozen peas, and a can of kernel corn because I was lacking the frozen corn aspect. It worked fine.
Throw the chicken, corn, black beans and salsa in the crock pot. I then put it on low for 4 hours. Once it was done, I shredded the chicken and stirred up the pot. I served it over jasmine rice with a bit of shredded Mexican cheese on top, but it is also quite tasty over tortilla chips with cheese and sour cream. Do your thing - it's kind of hard to screw up.
I even got the "pretty delicious" comment from my husband so, there's that. (That comment doesn't happen. Ever.)
So tasty, in fact, I didn't take any pictures. Sorry :*(